The 1/3rd Scale Berkut-Long EZ
Construction page two
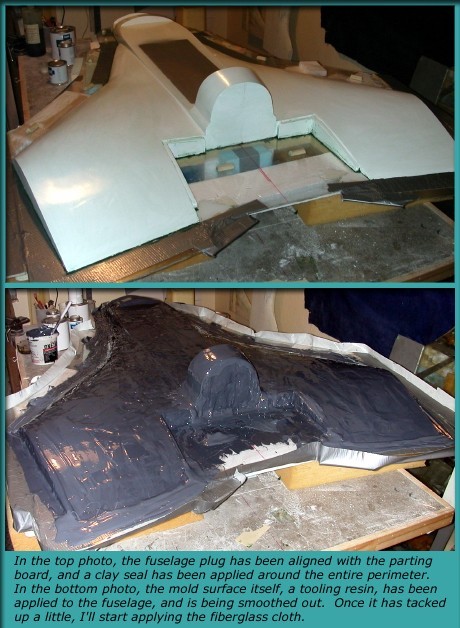
All molds were made using the same process. After wax and PVA, a coat of tooling resin was applied to the plugs. When this had tacked in slightly, many layers of cloth and chopped mat were used to build up the mold thickness. When the first half cured, the acrylic parting board was removed, and the second mold half was created on the flange created by the first mold half. This was a huge model, and more tooling resin should have been used here, but the budget was tight. This was deemed "ok", because at that time, the plan was to quickly get the pre-ordered kits done, then make some better molds.
Here's the top half of the first fuselage mold curing.
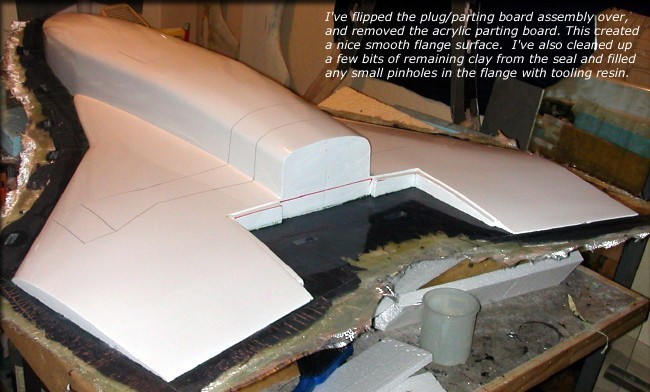
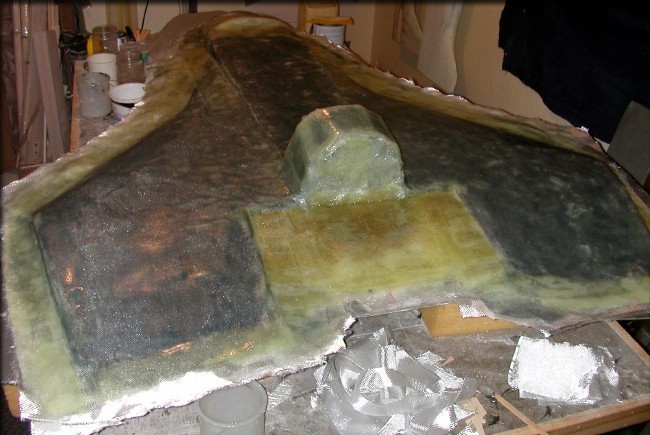
You can see here that the flange created by the first mold half is equally as smooth and shiny as the acrylic.
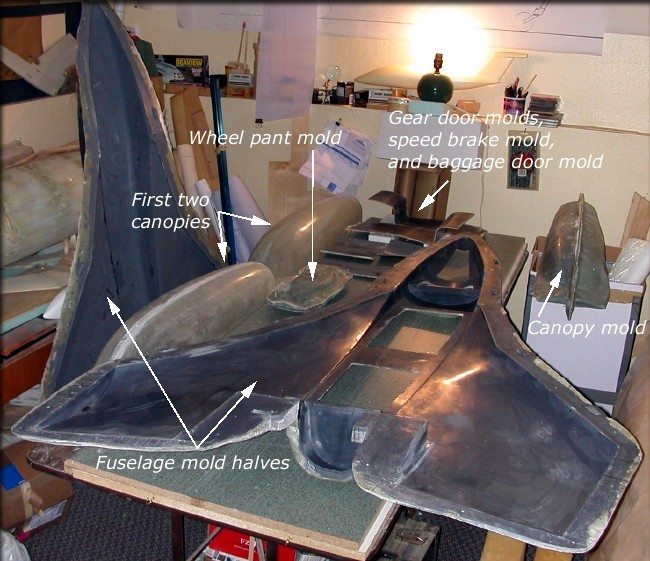
I made a couple of canopies here, to "practice" making some parts, then made the fuselage and other parts.
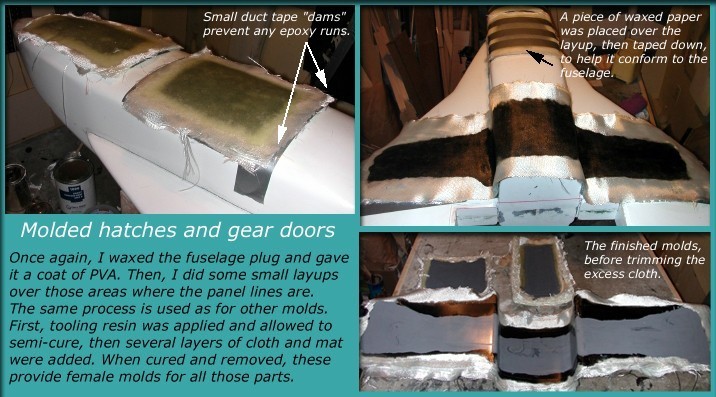
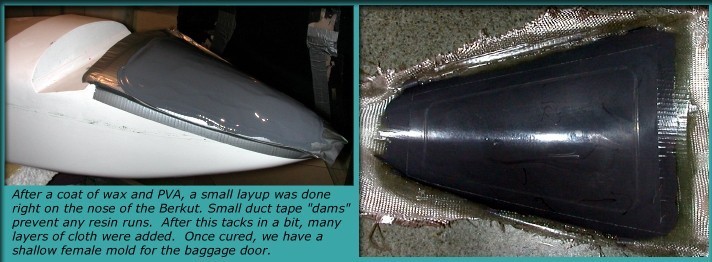
This photo and the next one show a simple method for making molds for doors and hatches, using the recessed panel lines already in the fuselage.
These parts fit exactly when later attached, because both the fuselage and it's doors were made from the same plugs.
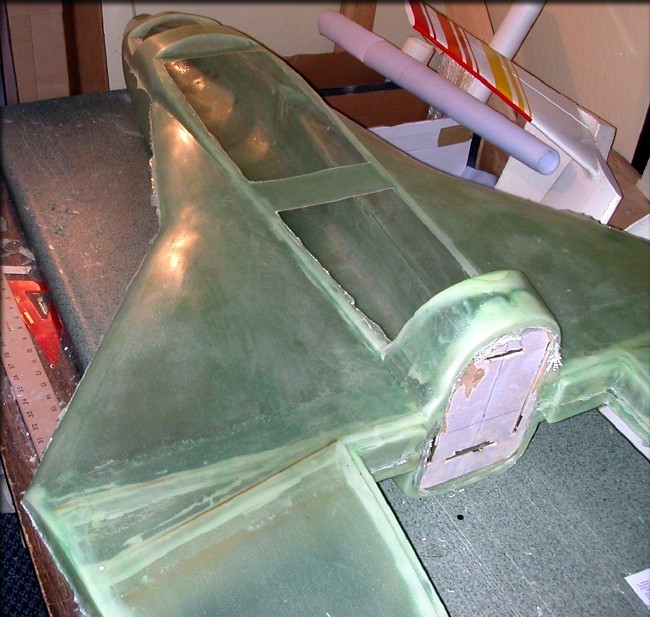
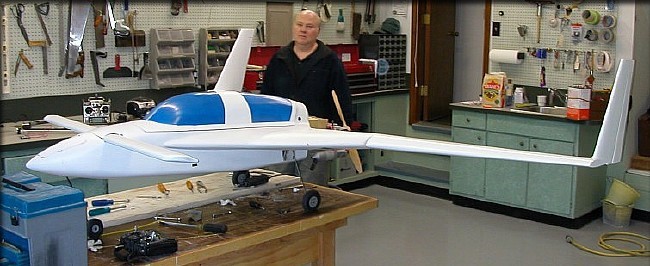
Here's one of the prototype fuselages, just out of the mold. There's a little flashing to trim. Note that the main spar and wing joiner spars are installed as part of the production.
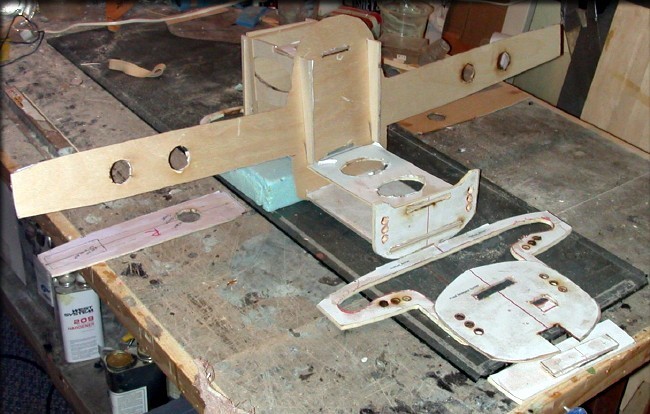
This is a front view of the internal parts layout, showing how the main spar, engine box, and main gear mount all interlock.
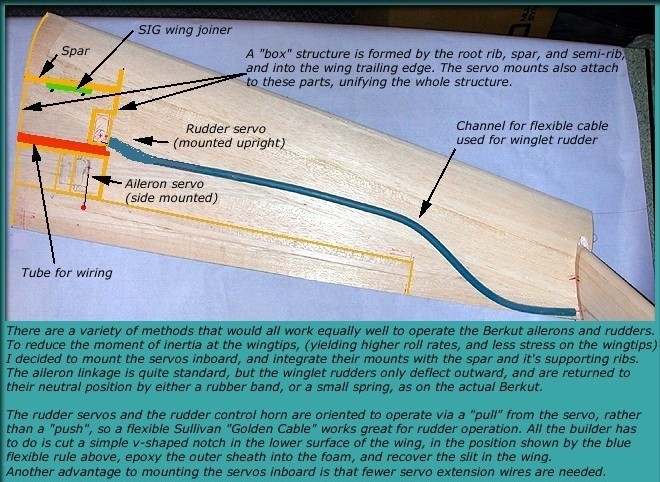
Here's the method I recommend in the final kit for controlling the ailerons and winglet rudders. Keeping the parts inboard reduces the outboard mass of the wings, providing a stronger structure, and a faster roll rate.
Test-fitting all the doors and hatches...
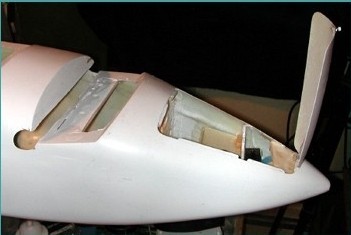
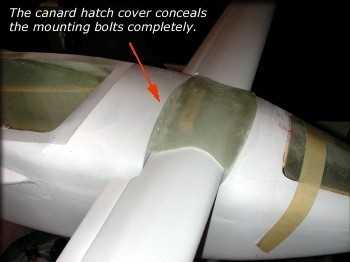
There was plenty of access to internal equipment in the nose, through the scale nose gear hatch.
Before test flights even began, I realized that the scale retract angles were going to cause some problems. For a full explanation of this issue, click here. The first test flights confirmed that the scale strut angles would not be durable enough, and also showed me that there was the expected issue with the canard airfoil. (See the Design Overview page.) After takeoff, using about 350 feet of runway, the plane immediately climbed to about 50 feet, then started a gentle descent, with me holding full up elevator. The good news is that, even in this stalled condition, the plane remained completely stable... No wing rocking, and more importantly, no disastrous snap roll and crash. Still, it took more than one plane to do the tests.
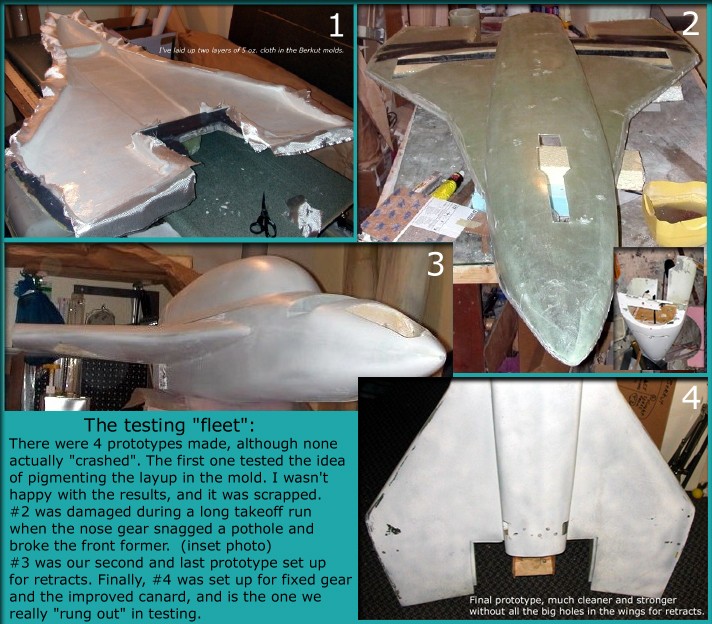
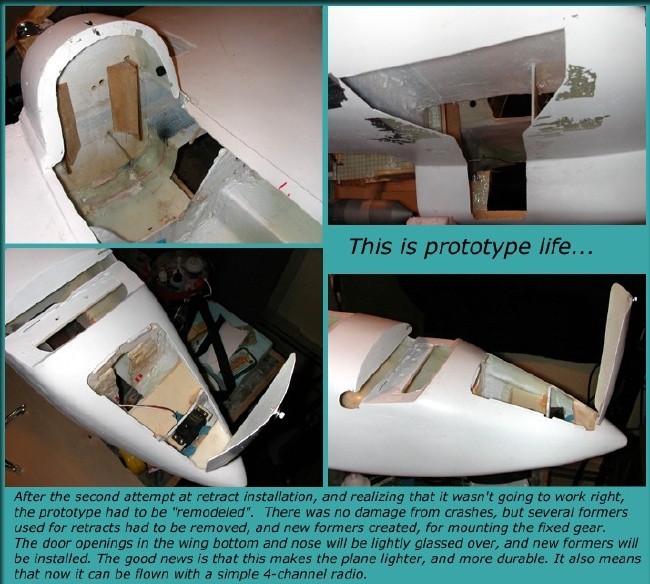
The caption on the photo above is something I created during testing. Instead of "glassing the retract cutouts", as mentioned there, I made a couple of flights with the cutouts simply covered with packing tape. Then the fixed gear design was first tried on the final prototype, shown earlier on this page. I also switched from the scale canard airfoil to a slightly larger chord and span canard, using an Eppler 197 airfoil with an additional degree of incidence. On these test flights, the plane rotated and flew, and I was able to fly around and land. But this was done holding nearly full up elevator and full throttle the whole time. I decided to leave the canard chord and incidence the same, but add a few inches of span, and switch to an Eppler 197 airfoil. I also moved the CG back approximately one inch. The results of these changes (next page) were remarkable. The plane now rotated in approximately 100 feet, from a grass runway, and I had complete and "normal" elevator control, including enough elevator power for a deadstick landing. (which he had a couple of times) Success!
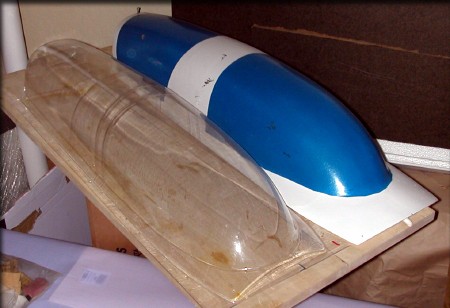
The vacuum formed clear canopies came out very nice! Since they were made from a tool created in my original molds, the clear parts fit perfectly into the fiberglass canopy.
Click the "Trimming & Flying" link below to see the results and final steps in the Berkut project.