The 1/3rd Scale Berkut-Long EZ
Construction page one
The first step was to collect every scrap of information on the aircraft that I could. I also decided that if I was going to build this model, I should do something really special with it. That clenched the decision to go with the Berkut variant. See the Design Overview page for a summary of the actual Berkut's development.
It's a sheer coincidence that several years ago, I did some research on canard/pusher aircraft, and collected information on the Berkut variant at that time. (then built by Renaissance Composites) I located Berkut Engineering and requested some drawings, which they very kindly sent. Those materials, combined with the resources that I already had on the original Rutan Long EZ, allowed me to get a basic CAD model and some drawings together pretty quickly. Rarely is documenting a future model so easy!

In this case, I chose to use 1/8" acrylic keels for the fuselage and canopy plug. Faced with a deadline and a limited budget, this was a quick way to reference the outlines, without building a strictly wooden structure. The other advantage is that the acrylic sheets from which these parts were cut become perfectly matching parting boards later, when making the molds.

All the plugs were basically built the same way. After an acrylic keel and wooden formers were assembled, a "mix and pour" polyurethane foam was used to stiffen all the structures. Once the correct shape is achieved, all the plugs are fiberglassed with a couple of layers of 6 oz. cloth, followed by a couple of layers of 3.5 oz. cloth. These steps make the structures and the surface rigid enough and durable enough to withstand all the following steps.
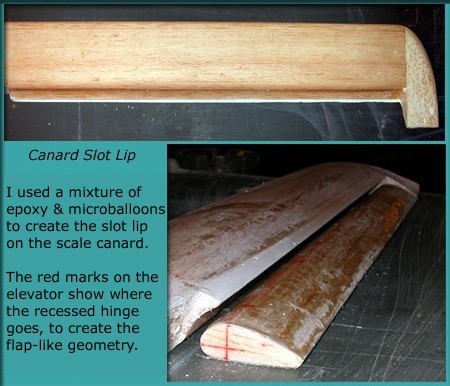
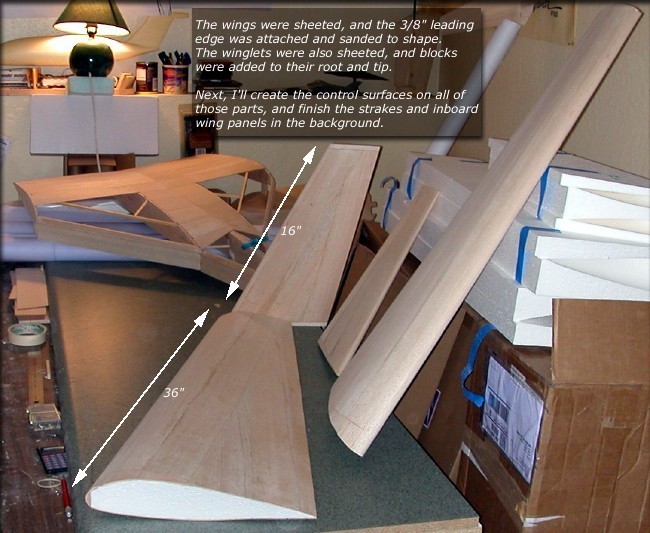
Not all parts are fiberglass. Wings, winglets, and a canard had to be created. All these parts were created from the same CNC machined foam cores intended for the kit, to insure that all parts fit correctly. The image above shows some work on the scale canard which was first used on the prototype.
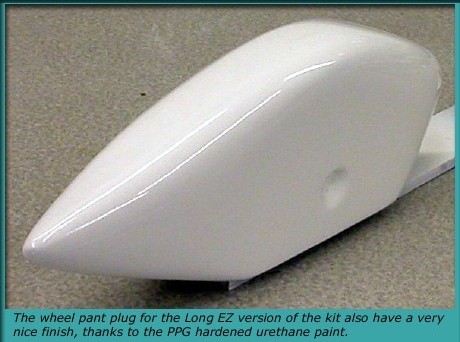
I wanted to do some chemical testing on a part that didn't cost a fortune in time or money, and a wheel pant works well. This plug's final finish was a hardened automotive PPG paint, applied with a HVLP (high volume, low pressure) gun.
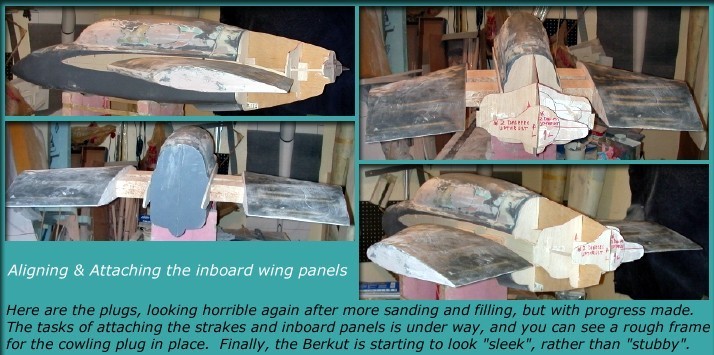
Once I was happy with the overall shape of the fuselage, it was time to align and attach the inboard strakes and wing panels, which would eventually all be molded as a unit. Since each section is at a different incidence, I took a lot of time on this. Once assembled, there's no going back!
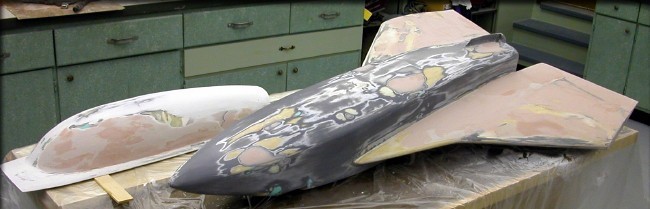
Urethane foam is a mess, but it's a fast and inexpensive way to construct something with compound curves, like a cowling, in a hurry. This plug was formed like the others, and the photo shows it about half through the finishing process.
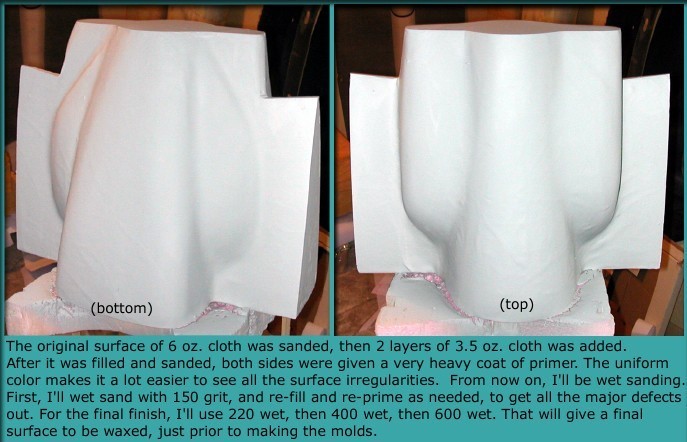
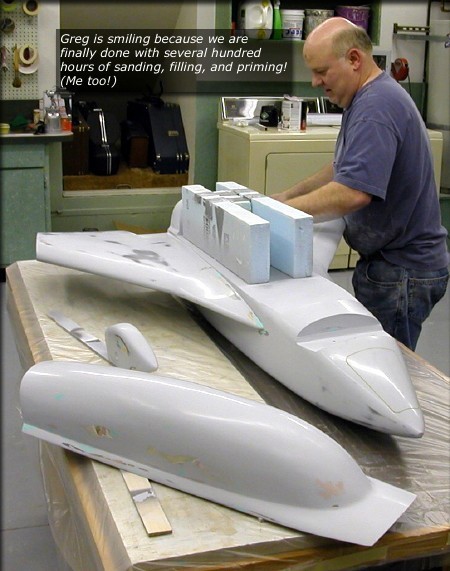
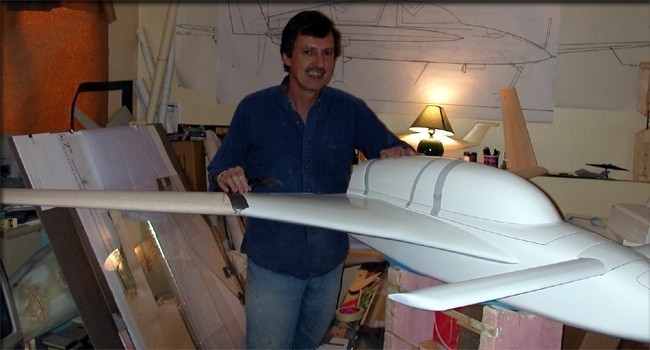
The assembled plugs were repeatedly sanded, filled, and primed many times. My good friend Greg Weeks (below) and I put in about 500 hours of sanding and finishing on these plugs, before we were completely happy with the finish. Composites always alternate between beautiful and ugly, during this long process.

We're not actually "done" at this point, but we know that only details remain. The canopy plug is in primer, and the fuselage was painted, so we could really judge how the final finish would look. Ultimately, we sanded almost all of the paint and primer you see here off again, before we were ready for the final finish coat.
After another hundred hours or so of sanding and filling, we got to this point. All the plugs have had one final coat of automotive primer sprayed on them, and they've been wet-sanded for a few days. At this stage, I applied 1/16" masking tape on those parts of the plugs that required recessed panel lines, then we sprayed them with PPG paint.
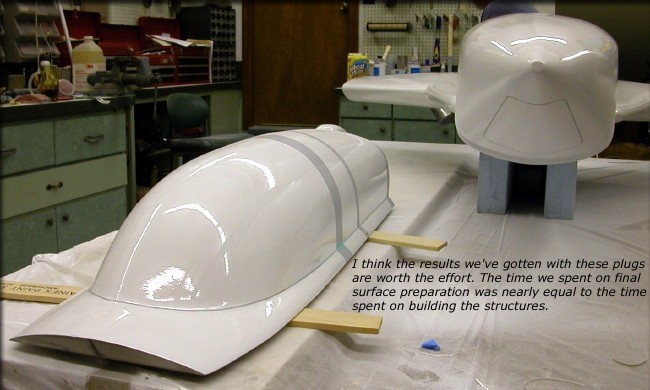
This is what we were looking for. All that remains is too use rubbing compound to remove any small blemishes such as orange peel.
Meanwhile, construction on flying (non-molded) parts was still under way.
All parts fit as they should, and I could start to see what the final model would look like. It's large!
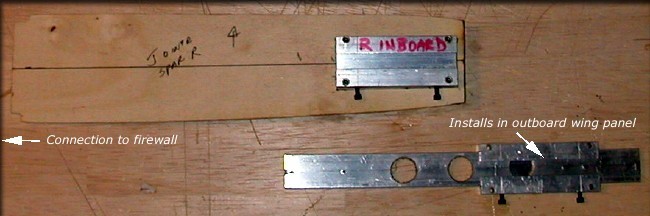
I used the SIG wing joiner assemblies to enable the outboard wing panels to plug in to the fuselage.
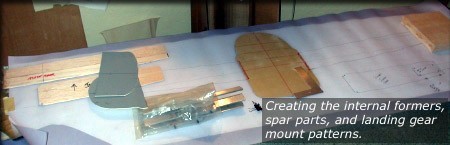
The fuselage required several formers.
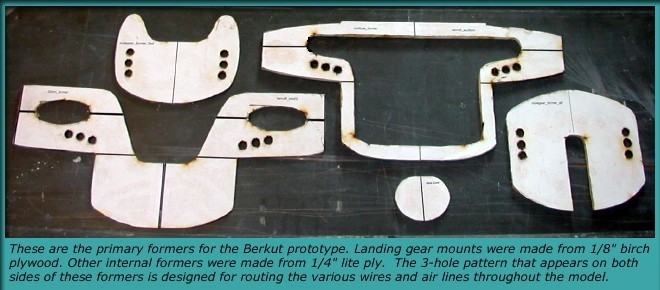
I thought it would be nice to add some holes in the formers, so modelers could route their wiring and air lines neatly inside the model. Note: These parts differ from the final laser-cut parts, because I made some modifications after flight testing the first prototype, and making a decision about the retracts.
Click the "Construction page two" link for more on the Berkut construction.