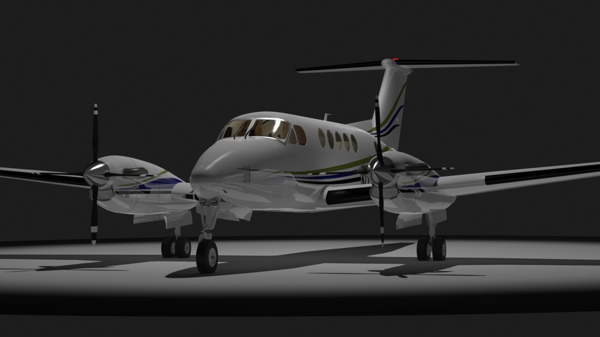
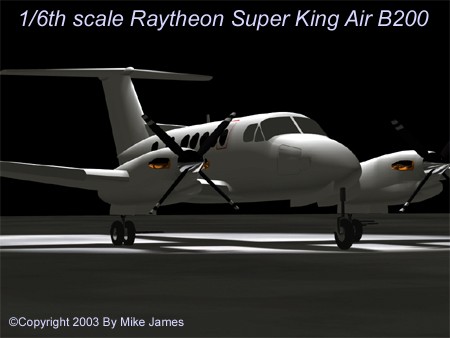
1/6th scale Raytheon Super King Air B200
Preparation and Planning
This model was hugely-updated in 2010, and is now available in my 3D Catalog.
You can find that much more detailed article on mikejamesmedia.com (image below)
A little background...
This is a collaboration between Paul Reese and I. Click here and visit Paul's Site, and I've included a couple of images of his work below. When you see the images here and on Paul's site, you'll see why he's a great building partner to have. His work has amazing depth, and it keeps me inspired to pay the same attention to detail in the initial design and plug making. We decided at the beginning to "go for it" and make it the very best precision scale model possible, worthy of Scale Masters and Top Gun. It'll also have the attribute of being original, which was something very important to us. We're designing and building it completely from scratch.
We're building it at 1/6th scale, giving it a wingspan of 109 inches. The model, including the wings and tail surfaces, will be completely molded in composites.
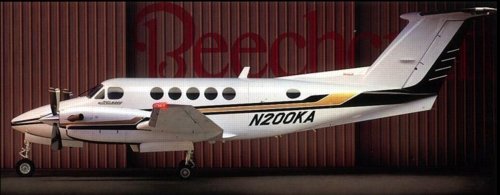
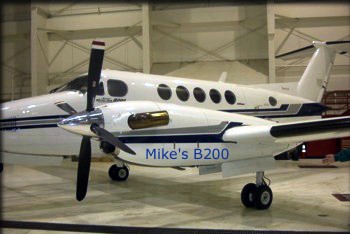
The full-size B200 is a real beauty.
We feel that the it's size and proportions will make a gorgeous scale model.
The model will accommodate either glow power or electric power. Since it will be completely molded, the conversion is a simple matter of changing the type of fiberglass in the molded parts, and altering a few internal components.
The process will go as follows:
Paul and I have collaborated on the design, sharing information on practically a daily basis. I'm making the geometrically-correct plugs, accounting for the thickness of the detailed (styrene plastic) skin that Paul will add when they're complete. After detailing, Paul will send the plugs back to me, and I'll make the molds. The advantage of a model made this way is that, should an accident occur which damages or destroys a model, it's not nearly so heartbreaking as it would be with a traditional model. It's "inconvenient", of course, but it's a much simpler matter to mold a new airplane and repaint it, than to rebuild the model entirely from scratch. In addition, all the scale detailing is virtually weightless, because it'll be molded into the airframe. This includes the fuselage, wings, tail parts, and nacelles! Why? Look at the next few images...
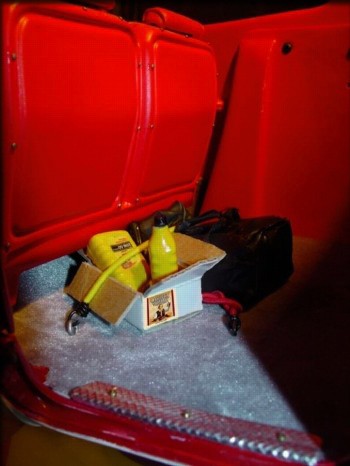
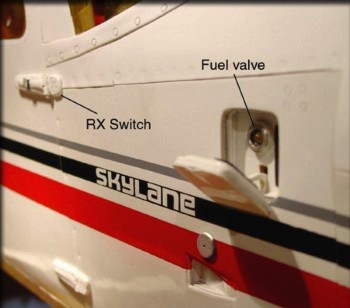
Here are a couple of images showing Paul's scale detailing skill, demonstrated on his Cessna 182. He's adding this same wonderful level of detail to the plugs for our B200, before I make the molds.
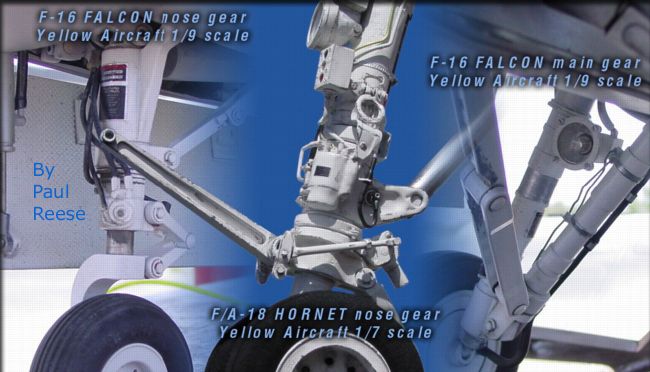
These landing gear details are on models! Ok, any questions about why I wanted Paul as a building partner?
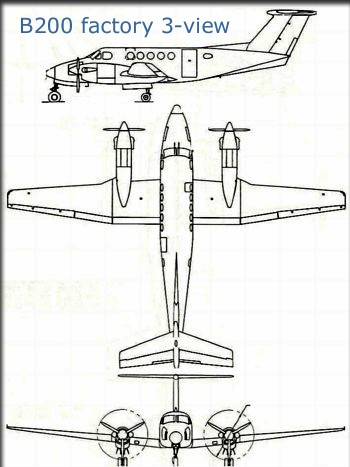
03-02 - Here's where we started, with a simple factory 3-view.
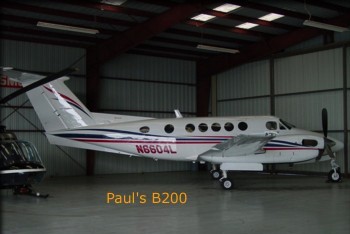
03-02 - Paul and I each found a beautiful B200 to document, in our own local area.
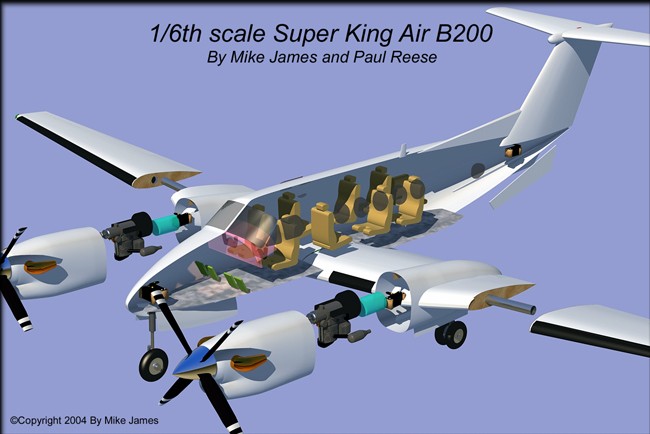
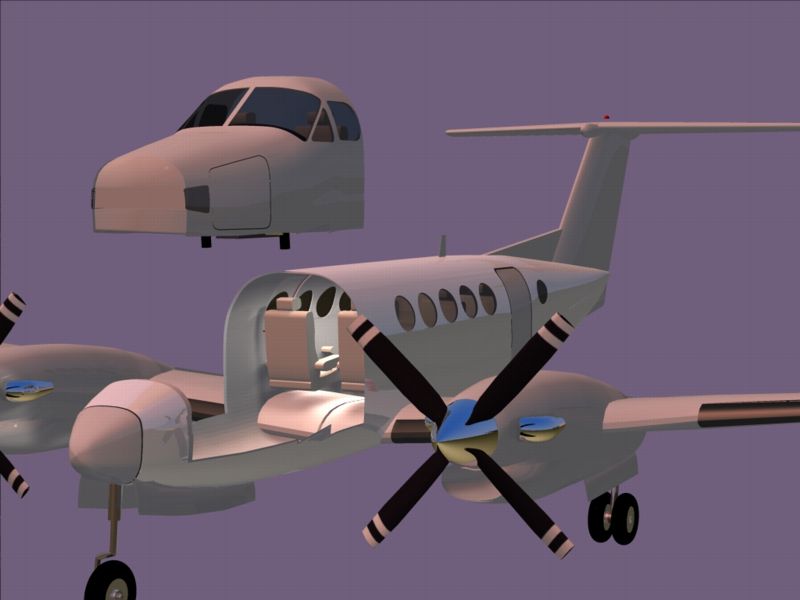
Continuing work on the CAD model, including RC installation.
The documentation phase of a project like this is critical... When you enter a scale contest, you must not only prove that your model is correctly proportioned, by furnishing factory 3-views and data, but you must also document a specific aircraft, proving that it's colors and markings are correct. Paul and I are both sticklers for detail at this stage, so we can relax later, knowing that the model is accurate. So...
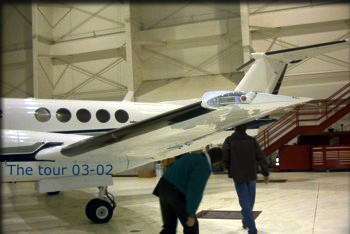
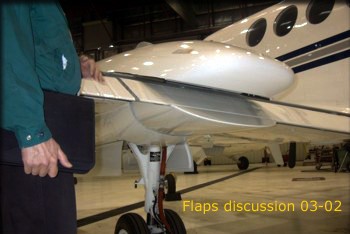
05-02 - I met with Mark Phillips, Chief Pilot for Petro Star, whose B200 I'm documenting. He gave me the complete tour, allowed us to take over 60 photos at our first meeting, and invited us back to gather more information as we needed it. Both of the aircraft that Paul and I are documenting include the very nice modifications by Raisbeck Engineering, including extended nacelle wing lockers, twin ventral fins, etc.. These not only add to the performance of the B200, but we think they improve the looks, as well.
Raytheon provided us with valuable data to insure our accuracy. Oliver Wilson, aerodynamic whiz (!) helped me with several "issues" regarding the airfoils, and Randall, at Raisbeck, provided us with the documentation we needed to accurately duplicate scale versions of all the Raisbeck modifications.
Several other modelers also contributed raw data, photos, and personal experience with flying the actual B200.
Thanks to everyone involved, for helping us through the critical documentation phase!
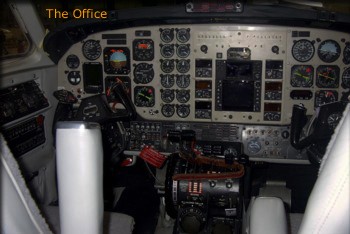
Here's the cockpit of N697P, the B200 shown above.
Mark Phillips, the pilot, says the aircraft handles like a dream, which was also my experience in test-flying a B200 on my "X-Plane" flight simulator. Of course, it's a twin, so engine reliability is something we're giving a lot of thought to! After about 3 months of research, and refining of the CAD model, we're ready to proceed with the construction of the plugs.
Paul lives in San Diego, California, and I live in Anchorage, Alaska. So, in addition to the normal design considerations, we had to figure out how we could ship such a large model to each other, and also gave some thought to the possibility of eventually selling some kits. To serve both purposes, we came up with some solutions to make this easier. We decided to allow the fuselage to be disassembled, with the tail section being removeable. The front part of the fuselage is also removeable, for easy access to internal gear, and to allow the interior scale items to slide in and out on a "tray" assembly, through this opening in the front. To insure that the model is strong enough, it'll be reinforced with Kevlar at this point. The nose gear box and the removeable hatch form a tough, load-bearing structure, when assembled.
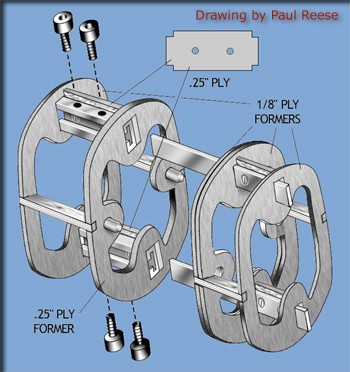
The drawing above shows Paul's solution to the joining of the tail assembly for both shipping, and for transporting the finished model. We're using aluminum channel/spar hardware normally used on large scale planes as wing joiners. All seams for the removable nose hatch and the tail assembly are located where seams occur on the actual aircraft, so they will be invisible.
For easy shipping, and transportation in smaller vehicles, this is how it will break down:
The fuselage, as mentioned above, will split into two major sections. The front section will also contain a removable nose hatch, allowing easy access to RC equipment and interior scale items. The aft portion, with integral vertical fin, is attached to the forward section with 4 bolts, all concealed. The wing center section, out to and including both engine nacelles and the main landing gear, will be a single component, and will attach to the fuselage using concealed bolts. The two outboard wing panels will plug into the center section, using concealed bolts. The horizontal stabilizer will be detachable, held to the fin by concealed bolts. This entire model will then be shippable under "normal" UPS and USPS services, not requiring an "oversize" shipping penalty.
During bench work, the wing center section can be attached to the forward fuselage section, allowing the model to stand on it's landing gear, without the need for either the aft fuselage or wing outer panels. This "core" portion of the aircraft, without the aft fuselage, is only about 60 inches long and 40 inches wide.
I created a set of full-size plans for the plugs, based on a combination of our CAD model, physical measurements of the actual aircraft, and various Raytheon drawings. Then I transferred outlines of the parts to 1/8th inch acrylic, for the keels and parting boards. Other templates, to be used as formers, were transferred to 1/8 inch lite ply. I've cut out all the fuselage, nacelle, and airfoil templates, and epoxied them to 1/8th lite ply, to be used as formers on our acrylic keels. Once attached, I'll add stringers to keep them in alignment and provide a good gluing surface for the sheeting. The plugs will then be fiberglassed, in preparation for Paul's scale detailing.
Click the "The Plugs 01" link below to continue.