How to Make Perfect-fitting Hatches, Canopies and Cowlings
It always bothers me when I see an otherwise beautiful aircraft model that has an ugly, ill-fitting canopy, hatch, or cowling. It makes good sense to perfect these seams for aerodynamic reasons too, so that there's less drag, and less chance of the item actually getting blown off in flight! Sloppy hatches can also allow exhaust from your engine or smoke from your smoke system to get back into your model, creating quite a mess. There are several things you can do to insure a great, almost seamless fit, and they're not difficult to do. Let's use the example of a typical removable canopy, found on many models.
The first step occurs when making the plugs and molds. Most of my models use a removable canopy. Although the parts will be removable, I keep the canopy plug attached to the fuselage plug throughout all but the final finishing process. You could use a latch, screws, or simply tack-glue it to the fuselage plug, but make sure it doesn't move.
I only separate the plugs when they are ready for the final primer coat, so a great fit is nearly insured, and precision molds are guaranteed. Still, epoxy isn't perfect, and sometimes your "perfect" parts will shrink slightly, or possibly deform, due to some structure you place inside them, or even the paint used.
One thing you can do right in the mold is add a couple of carbon fiber "bands" on the inside surface of the part, to add rigidity. You could also add light plywood formers. Still, the fit might not be perfect.
One method that works well is to apply a thin material that epoxy won't stick to, to either the fuselage or canopy temporarily. This could be a piece of iron-on covering, or the covering's backing material. You could use waxed paper, or a piece of thin aluminum foil, sprayed with PVA. Whatever it is, make sure it'll conform to the "flange' surfaces of your parts. Mix up a batch of epoxy and micro balloons, apply it to the surface NOT covered by the non-stick material, then align and join the two parts together firmly until the filler cures. Wipe off any excess before it cures. One application of this may be enough to give a perfect fit. If not, simply repeat the process, sanding very carefully in between.
Today, I use a somewhat different approach. Taking the example getting a canopy plug to precisely fit on a fuselage plug:
Finish one part, such as the canopy flange on the fuselage plug. Then give it a couple of coats of wax, followed by a coat of PVA, and let it cure. Next, apply a liberal layer of epoxy and microballons to the flange, and press the canopy plug in place. Be careful to align it the way you want it, and wipe the excess epoxy off immediately, leaving only enough to "fix" the canopy plug. Let it fully cure. The filler will stick to your canopy plug, but not to the fuselage plug.
Sand this until the parts fix exactly the way you like, then very carefully separate them. Gently, use a very thin tool, such as a new X-Acto blade or a razor blade to start the separation, and usually the part will pop free. Take your time.. Once you have a slit started, you can use a small amount of warm water, (to dissolve the PVA) or a strip of mylar inserted into the slit, and as it opens further, you might even use a soft nylon wedge. You don't want to damage the edge you just created.
When the parts are finally separated, clean them up, and you'll have perfectly-fitting parts. Here's the canopy fit on the "Eliminator 2"...
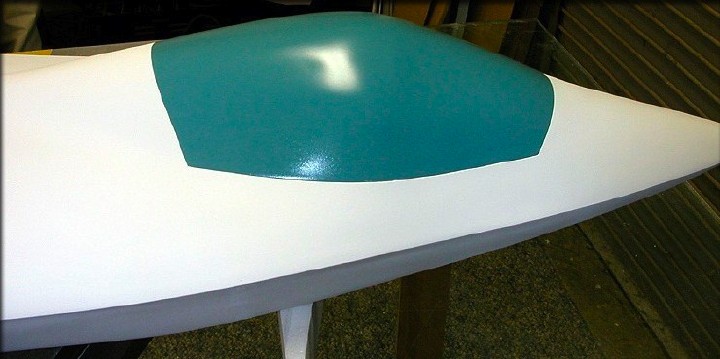
Clearance here between the two parts was less than the thickness of a piece of typing paper.
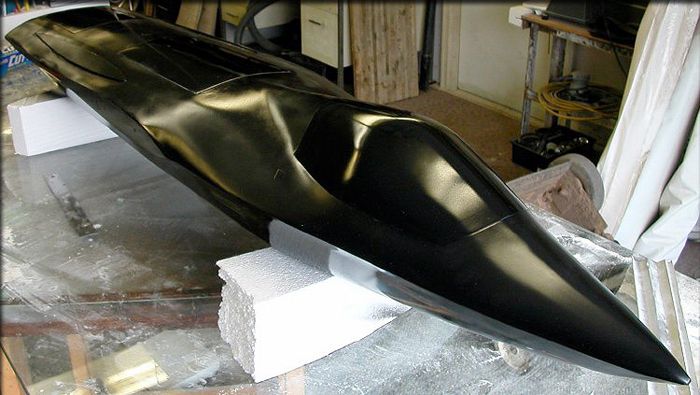
Here's the final canopy/fuselage fit, after more detailing.
Below are some photos of the original "Eliminator".
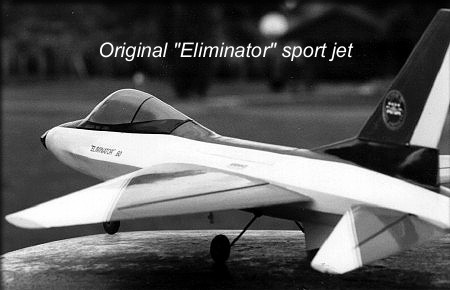
Here's a photo of my "Eliminator 1" sport jet, which used the techniques above to perfect the canopy seam.
There's also a large access hatch on the top of the fuselage, with an "invisible" seam.
Use the same technique for gear doors and any other movable or removable parts.
Many other types of hatches are demonstrated on the King Air pages, and the "Eliminator 2" pages.