Simple Solutions to Problems
Problem: The high price of fillers
Solution: Make your own!
For a very professional, surface coat finish, buy high quality fillers, and just try and get the best deal you can. (Fillers are much cheaper to buy in bulk than at the local hobby shop, by the way.) For fillers used to make the internal structures of plugs stronger, or for internal structures in plugs that won't be seen, make your own! When you sand balsa, save the dust in a clean container. It makes a great filler, when mixed with wood glue or epoxy. When you sand fiberglass, save that material in a separate container. The image below is what is left after a hefty sanding session on some fiberglass. This powder contains powdered epoxy and micro balloons, as well as thousands of very short glass fibers. This makes an excellent filler when mixed with epoxy, and best of all, it's free.

Problem: The need for custom, precision control horns, bellcranks, hinges, and springs
Solution: SONY™!
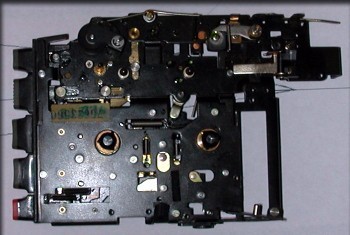
Before you throw away anything, take it apart and have a look...
The image below shows the guts of an antique Sony Walkman-type tape recorder, headed for the trash. First though, I took about a half hour to dismantle it. These gadgets have a million small, precision-made parts inside them that might ultimately make it into a future project. My motto? Save everything!
Problem: How to stiffen a hollow structure without too much effort.
Solution: Polyurethane foam!
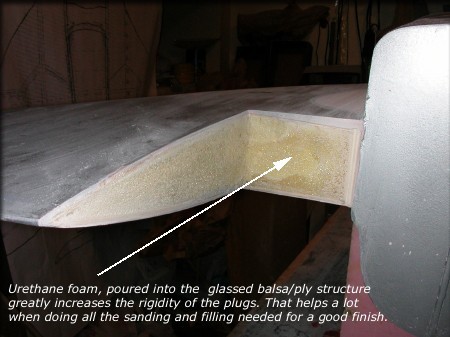
The image below shows a short-span wing structure I made, which would become a plug for a mold. To make sure it remained rigid throughout the rest of the process, I simply poured in some 2-part, "mix 'n' pour" polyurethane foam. (It will run out of every hole as it expands, so don't do this in your living room! After it cured, I sanded it flush with the outside ribs, and it became very strong. This method is too heavy for flying parts, but good for plugs.
Problem: How to make custom wheel well liners for your retract-equipped model
Solution: Make your own!
There are two methods shown, but each method uses a simple 2 liter soda bottle as it's starting point. In this case, I used the 2 liter bottle because it happened to be the right size, but any smooth glass or plastic container will do. Whatever container you use, the first steps are the same... Clean the container, dry it, and then give it a couple of coats of mold release wax, (such as "Partall") followed by a coat of PVA. The first method is used when you want to create the wheel well liners from balsa.
Balsa Wheel Well Liners
Cut some pieces of balsa sheeting to the right height for your wheel well. In the example shown, I made the sheets tall enough for TWO wheel well liners, with a little material to spare. It just worked out that way, due to the bottle's height. You can just as easily make one at a time. Glue the sheets together, as you would if you were creating balsa wing sheeting parts.
If you just try and bend the balsa around the container, it will crack. So, take a damp washcloth or paper towel and dampen the balsa on both sides, which will enable you to bend it without breaking. Some modelers use ammonia or other liquids in the water, but water alone has always worked fine for me. Gently test-fit the sheets around the container, and using a fine-line pen, mark where the sheets overlap. Cut the sheets outside the line, so you have enough excess material to sand gently, and make a perfect fit. When you're happy, either glue the sheets together, or simply use masking tape. (I prefer masking tape, so I don't risk gluing the balsa to the container.)
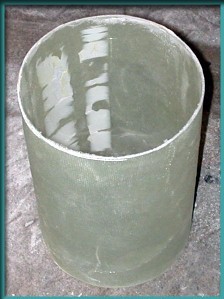
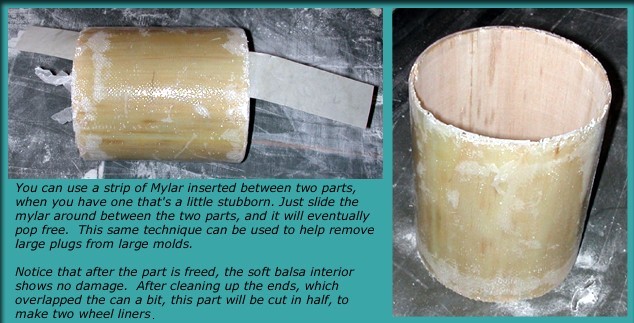
Finally, harden the balsa. You can do that in a variety of ways. If you're highly concerned with the weight, do something simple like adding a single layer of lightweight (.5 oz. to .75 oz.) glass cloth, applied with epoxy. Another alternative is to give the balsa a coat of wood glue, diluted with water. When it's cured, separate it from the container. If you used a plastic bottle, you can flex it, to help release the balsa. If you used a metal or glass container, try inserting a piece of thin plastic, like mylar between the glass and the balsa, and slide it around the container until it releases.
* Note: In my version above, I actually laminated TWO layers of balsa. I also cut the bottle plastic away, close to the balsa.
Fiberglass Wheel Well Liners
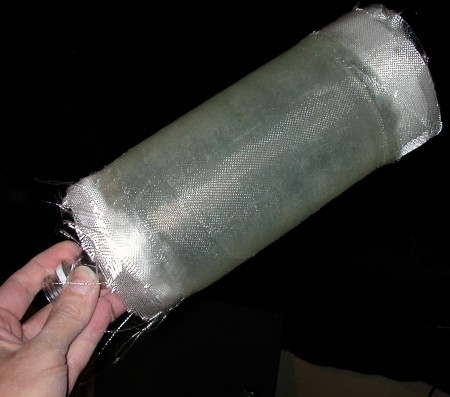
After the wax and PVA, simply start layering glass cloth onto the container, until it's sturdy enough to suit your needs. Generally, I would use two layers of 4 oz. to 6 oz. cloth, but you can make these much lighter or much heavier, depending on your requirements. When it's cured, use the same methods mentioned above to separate the material from the container. The inside of these wheel well liners will be as smooth as your container. Just insert them into your wing, mark a trim line, and fit them in place. Remember to cut a slot in one side of these liners, for the landing gear strut to pass through. (!)